


 Trial fit of new o/s door runner track.


 The door runner track were to badly corroded to be used so I have had to make up new tracks from scratch using bar and flat steel. The following pictures show the process.


 More wonder materials used in the repairs to the side panels.

 Now attention now turns to the n/s sill/door runner area.


 Here the o/s step panel has been welded in and the bottom of the B post has been repaired.


 The front outer step panel removed.


 The following pictures show the new sill/door runner panel trial fitted in place,

 The lower section of the o/s strengthening rib repaired.

 The o/s sill/door runner panel removed.


 This shows the back of the section that I cut away from the o/s side panel and it shows the strange materials used to "repair" the lower section of the side panel.
 The new o/s front door well panel trial fitted.

 Here I have made up a new o/s front door well panel.

 Side door well panel badly corroded.

 These pictures show all of the door step panels removed.


 Here the o/s lower side panel has been cut away to reveal very corroded door runner/sill panel.
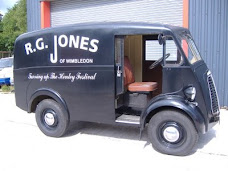
Morris JB Van registration OBL 432 as it arrived at my workshop. It was looking tidy but on closer inspection it was obvious that the bottom of both side panels were full of fibre glass, filler and other strange materials,


Hi Maurice and the team -
ReplyDeleteThanks for all the photos ... keep them coming! My 1958 JB van 'Bugly' is in need of the same work, and your photos are going to make it so much easier to follow! I am interested to see how you are going to allow to clean and drain the door well area so the same problem doesn't happen in the future!
Regards - Bugly
Bugly
ReplyDeleteGlad to hear you are enjoying the pictures and that you will find them useful in the repair of your own van. The side panels have elongated holes in the bottom of the side panel and holes in the bottom of the outer step panel. The inner part of these panels have been/will be painted and injected with a wax presevative. I hope this helps.
Regards
Maurice
hi Maurice,
ReplyDeleteWhat a splendid job you have done on this vehicle, I hope to contact you soon about repairs to a rough gpo postal minor van. Speak to you soon, regards MR